iOS Push Notifications
Here you will learn how to set up all the Group Link iOS SDK functions to support Push Notifications in your application.
Step 1 - Activate the Push Notification Entitlement
On the Signing & Capabilities tab of your target settings, click on the “+ Capability” button, and add the capability Push Notification.
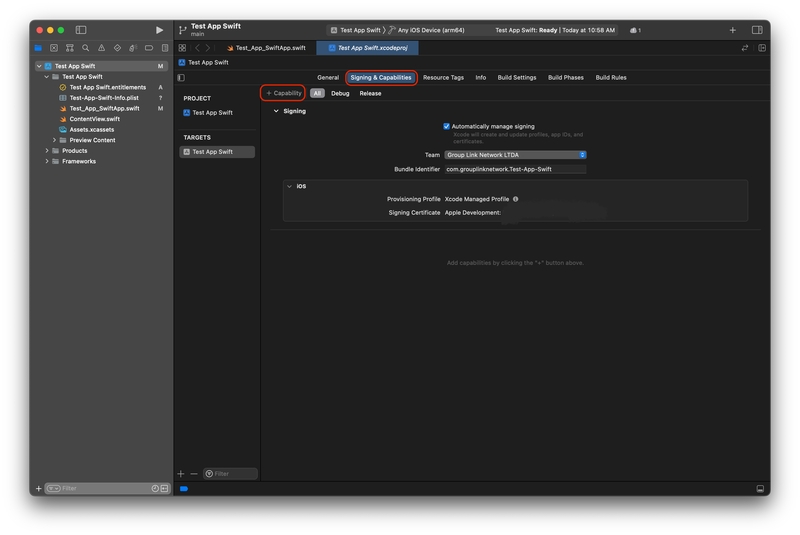
Signing & Capabilities page
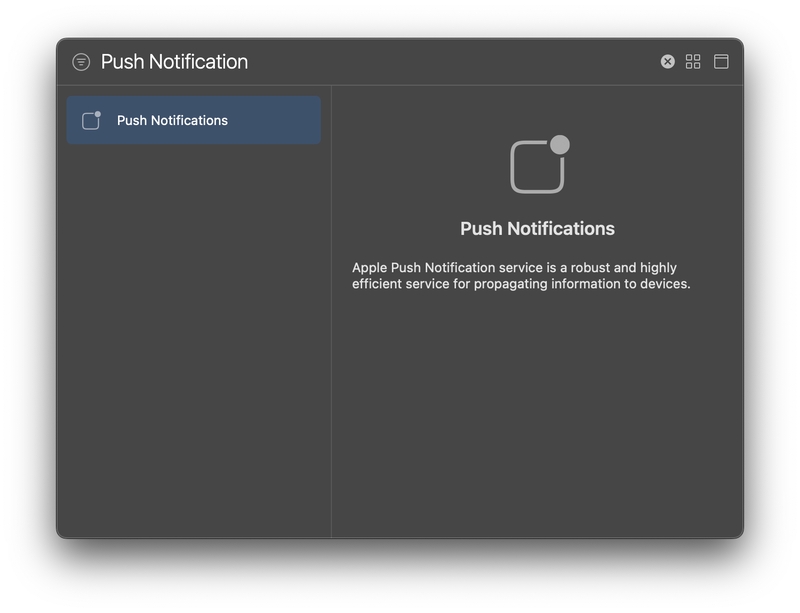
Push Notification Capability Screen
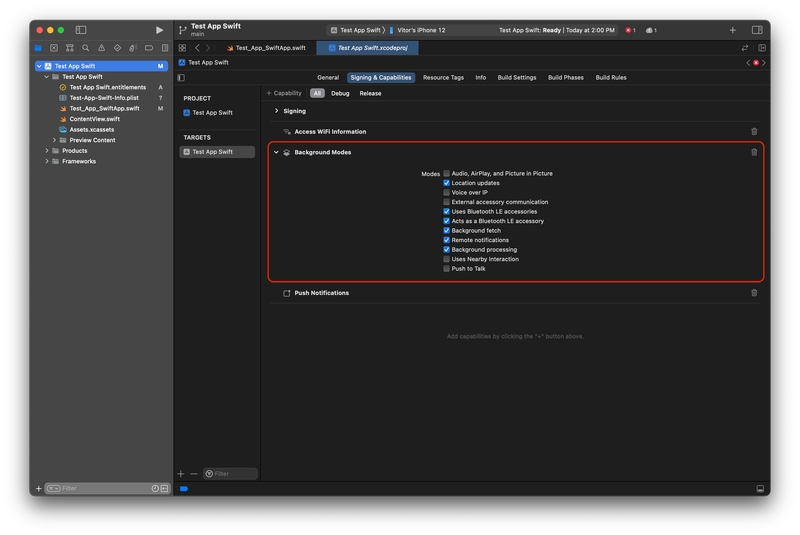
Enable Required background mode
The Group Link framework Push Notification support needs the Remote Notification permission inside the Background Modes entitlement to work properly.
Step 2 - Asking for Permission
Now, to ask the user the permission to show notifications, below is the code of how to implement this function.
Swift Implementation - With Badges
let center = UNUserNotificationCenter.current()
func requestNotification() {
    center.requestAuthorization(options: [.alert, .sound, .badge]) { granted, error in
        if let error = error {
            print("Error asking for notifications: \(error)")
        }
        print("user granted notification")
        // Enable or disable features based on the authorization.
    }
}
Swift Implementation - Without Badges
let center = UNUserNotificationCenter.current()
    func requestNotification() {
        center.requestAuthorization(options: [.alert, .sound]) { granted, error in
            if let error = error {
                print("Error asking for notifications: \(error)")
            }
            print("user granted notification")
            // Enable or disable features based on the authorization.
    }
}
Objective-C Implementation
- (void)askNotificationPermission {
    UNUserNotificationCenter* center = [UNUserNotificationCenter currentNotificationCenter];
    [center requestAuthorizationWithOptions:(UNAuthorizationOptionAlert + UNAuthorizationOptionSound)
                          completionHandler:^(BOOL granted, NSError * _Nullable error) {
        // Enable or disable features based on authorization.
    }];
    [[UIApplication sharedApplication] registerForRemoteNotifications];
}
Call this function anywhere in your app. In the next example, we will use the application start.
SwiftUI Implementation
@main
struct Group_Link_SettingsApp: App {
    init() {
        self.requestNotification()
    }
    var body: some Scene {
        WindowGroup {
            ContentView()
        }
    }
}
UIKit Implementation
class AppDelegate: NSObject, UIApplicationDelegate {
    func application(_ application: UIApplication, didFinishLaunchingWithOptions launchOptions: [UIApplication.LaunchOptionsKey : Any]? = nil) -> Bool {
        self.requestNotification()
        return true
    }
}
Objective-C Implementation
- (BOOL)application:(UIApplication *)application didFinishLaunchingWithOptions:(NSDictionary *)launchOptions {
    [self askPermission];
    return YES;
}
Step 3 - Register for Push Notifications
Next, you have to implement the iOS UIApplication.shared.registerForRemoteNotifications() inside the didFinishLaunchingWithOptions function on your AppDelegate file, if you are using SwiftUI to develop, you will need to use the UIApplicationDelegateAdaptor to implement.
Swift Implementation
class AppDelegate: NSObject, UIApplicationDelegate {
    func application(_ application: UIApplication, didFinishLaunchingWithOptions launchOptions: [UIApplication.LaunchOptionsKey : Any]? = nil) -> Bool {
        UIApplication.shared.registerForRemoteNotifications()
        return true
    }
}
@main
struct Group_Link_SettingsApp: App {
    @UIApplicationDelegateAdaptor(AppDelegate.self) var appDelegate
    var body: some Scene {
        WindowGroup {
            ContentView()
        }
    }
}
UIKit Implementation
class AppDelegate: NSObject, UIApplicationDelegate {
    func application(_ application: UIApplication, didFinishLaunchingWithOptions launchOptions: [UIApplication.LaunchOptionsKey : Any]? = nil) -> Bool {
        UIApplication.shared.registerForRemoteNotifications()
        return true
    }
}
Objective-C Implementation
- (BOOL)application:(UIApplication *)application didFinishLaunchingWithOptions:(NSDictionary *)launchOptions {
    [application registerForRemoteNotifications];
    return YES;
}
Step 4 - Setting Push Notifications Extension
To receive the notifications KPIs for your application, you will need to set up the notification extension in your app. To set up, just follow the guide below.
Setting Notification Service Extension
First, you have to create a Notification Service Extension, it's simple, just go to your project file General tab, and in the targets menu, click on the plus sign.
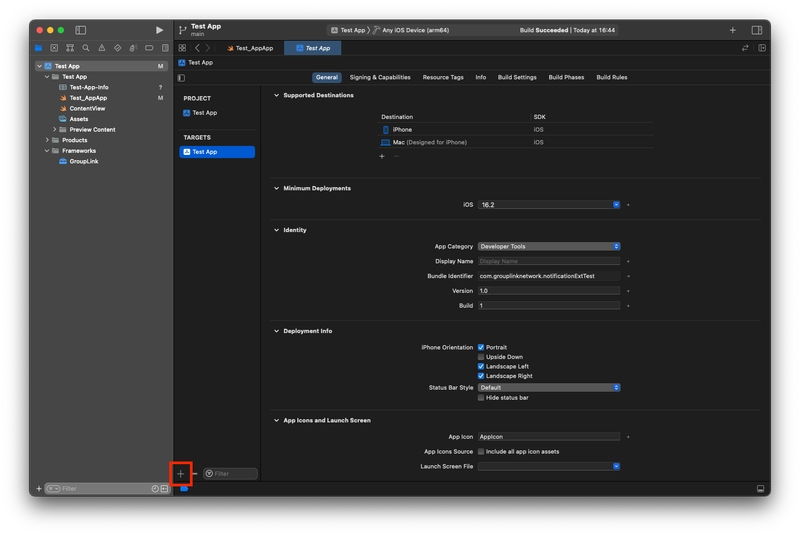
Extensions plus sign inside your project
After clicking, a window will appear to select the extension type you want, Apple will provide a variety of extensions to your application, but you will choose the Notification Extension Service, this extension's purpose is to implement rich notifications, such as notifications with images, URLs, and more data.
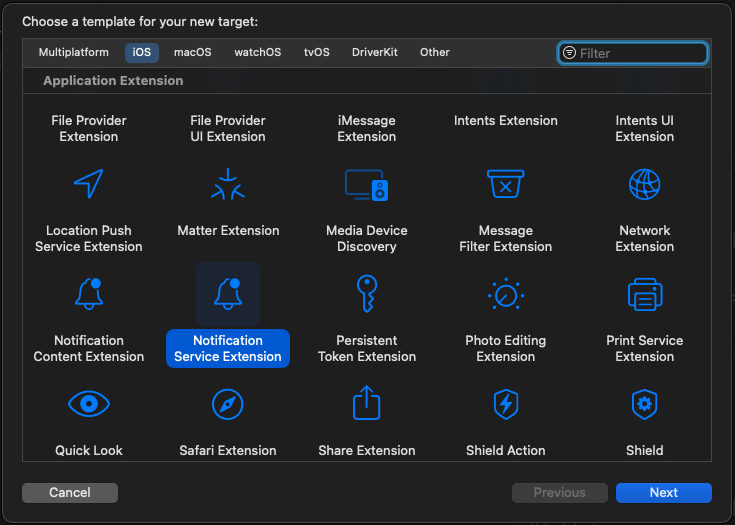
Notification Service Extension Menu
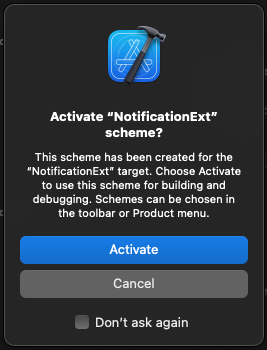
Xcode will ask if you want to debug the Notification Service Extension instead of your application. Click on Activate or Cancel to continue debugging your application.
Debug Extension screen